On Wednesday, I wrote about the importance of spinal articulation and why we need to break out of doing only the movements our bodies are already good at. The WAVE is one of my favorite spine exercises for doing just that. It feels so good to move when we pay attention to both the muscles we use all the time and the ones that never seem to come into play in our daily life and/or fitness “routine”.
My challenge as a teacher of movement is to make poses and exercises simple and enjoyable—even for folks who might not find them so simple. Sometimes I have trouble locating the right words, but I love breaking down complicated movements into bite-sized pieces. The WAVE might seem like a lot to keep track of at first, but you’ll find that it helps you explore your body’s blind spots , establish new neuromuscular connections, and become aware of how the diaphragm, TA, multifidus, and pelvic floor all interconnect.
On Wednesday, I also talked about the importance of being able to differentiate your pelvis from your spine, or your lower back/lumbar spine from your ribcage/thoracic spine. I discussed how this lack of proprioception can lead to undifferentiated global back pain for many of my students and clients. They had pain, but couldn’t articulate where the problem was.
That’s where the WAVE comes in. This exercise has helped many students strengthen and traction their spine on their own. It’s prevented their back pain from recurring and has given them a firmer grasp on what’s doing what inside their backs.
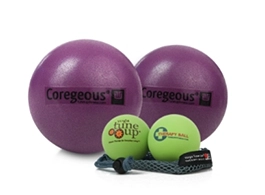
My husband often says, “Trina, use your words!” when I get tongue-tied. So here it goes… I will attempt to explain the WAVE exercise in words. For those who are visual learners I’m also including a video. We’ll be using the YTU therapy balls, which kinesthetic learners will find helpful. Some of us like multiple ways of learning; I know that I do. I hope you catch the wave and enjoy the ride!
The Wave
1) SET POSITION with BREATH CHECK: Lie on the floor in ardha savasana/constructive rest position. Inhale and swell the belly, then the ribs, and then exhale. Repeat this breath pattern 3 more times. Noticing if there is any tension in your neck or the tops of your shoulders.
2) SELF MASSAGE: Place 1 YTU ball under your sacrum and the other one on or just slightly under your bra/bro strap. Rest and allow the balls to sink into these two areas of your body. The sustained compression will begin to soften the muscles and fascia here. On an exhale, round your lower back toward the floor slightly—use your abdominal muscles and pelvic floor. On an inhale, arch your lower back using the deep low-back muscles in conjunction with the transversus and pelvic floor. Continue this pattern for 5 more breaths, getting a sense of your body in the area from below the ribs to just above your tailbone. As you exhale and round your lower back, imagine rolling a marble from your pubic bone to your belly button. As you inhale, roll the marble from your navel back to your pubic symphysis. Notice if it feels easier to arch your lower back or to round your lower back. This will give you information about any front-to-back discrepancies in the strength of your tubular core muscles. Rest.
RE-SET POSITION in ardha savasana with BREATH CHECK: Take the balls out and notice any new sensations in your lower back. Does it feel heavier? lighter? warmer? cooler?
Inhale and swell the belly, then the ribs, and then exhale. Repeat this breathe pattern 3 more times. Is there less tension in the neck and tops of the shoulders?
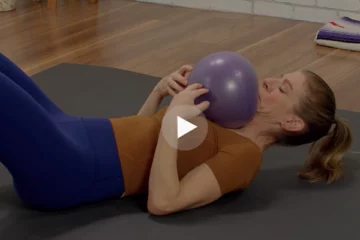
3) THE EXERCISE: We’ll begin with WAVE UP in Flexion. Still lying on the floor, place 1 YTU ball on your xiphoid process – that’s the bony tip at the bottom of your sternum. Place the 2nd YTU ball on your pubic symphysis between your pubic bones. A muscle called the rectus abdominus attaches at these 2 places. This is the famous “6-pack” muscle on the cover of all the fitness magazines at the grocery store. It flexes your spine. Your feet are hip-distance apart with the toes pointing forward. Place one block between your feet and the other block between your thighs. On an exhale, press your lower back into the floor and peel your spine off of the mat one vertebra at a time until the pubic bone ball is much higher than the xiphoid ball near your sternum coming into your bridge position.
4) WAVE DOWN in Extension: Embrace your inner Beyoncé and let the spine arch and lower your tailbone down to the floor. Then sequentially roll through the sacrum, low back, and middle back, and finally return to the lifted bridge position.
Continue to wave through 5 more times repeating steps 3 and 4.
5) THE EXERCISE in Reverse: WAVE UP in Extension: Inhale and bridge up your pelvis with slightly extended spine.
6) WAVE DOWN in Flexion: Sequentially lower the upper back, middle back, lower back, sacrum, and tailbone. Continue to WAVE through 5 more times. Imagine that your spinal vertebrae are like dominos. One gets tapped and the others follow suit in a rhythmic sequential fashion.
7) RE-SET POSITION with BREATH CHECK: Inhale and swell the belly, then the ribs, and then exhale. Repeat this breathe pattern 3 more times. Is there less tension in the neck and tops of the shoulders? More movement available to you in the belly and ribs on the inhalation.
If you want to know more about spinal articulation and the breath, check out this Yoga Tune Up® video of an exercise called “Bridge Lifts.”





It’s too bad that the video won’t play as I’m a visual learner but great use of your words to describe it! I’ve used the tune-up balls on many parts of my body, but never on my tubular core muscles, quite effective technique!
Wow, flowing through the wave in bridge pose made all the difference (and I could actually feel like Beyoncé this time 😉 ). Changing the orientation with the spine on the floor, opposed to making the wave in all fours, helped me feel the movements of my spine even more as they get away and into the floor. Also, gravity played a different role in here! I love the wavy spine, because although is a challenging movement, at least for me, is also really grounding. Trying to figure out how to create the spinal articulation made me feel present and aware of sensations. Thanks Trina!
Love the WAVE. Too bad the video won’t play, sometimes it’s easier to ‘see’ instead of read the practice and process.
Thanks for the tip!
Fun! Love the way you use the visual of rolling a marble from pubic bone to navel to get us to tilt the pelvis. Will definitely be using this in my teaching!
Just finished trying out the WAVE! Will be sharing this exercise with my students. Thank you for the step by step instructions.
This not only is perfect for spinal articulation but a great way to propriocep our breath work. We did it today with Taylor at our embodied training where I really focused on my abdominal, thoracic and clavicular breathing through the wave methodology. Wave rhythm helps me to articulate my spine carefully and explore more!!!
I love the bit by bit breakdown!! Super helpful!!
thank you!!
This feels great. Bummer I can’t access the video ( I am definitely more a visual person) but your description is awesome. Thanks.
I am reading this blog while in transit even though the written description is awesome I am having trouble visualizing it unfortunately i cannot get the video to play but I will try it out when I get home.
This is a great article explaining the exercise very clearly! I am looking forward to trying this out to see how my spine moves and what I feel. I have scar tissue and lowered proprioception in my spinal area with difficulty extending my spine due to a severe injury when I was younger. While it is now fully healed and I have very little pain, I know this is an exercise that will challenge me and help me to reconnect with my spine. So excited to give it a try! Thank you Trina!
Thank you, this exercise really helped me differentiate sensation between my lumbar and thoracic spine and between my spine and pelvis. Your explanations and descriptions are so detailed and vivid!
Hi Jessica,
One easy way to help your students differentiate their pelvis from their spine is to :
1) While standing, have them hold their ribcage still with their hands and practice only anteriorly and posteriorly tilting their pelvis without any movement in the thoracic spine/ribcage. A great warmup for bellydancing:)
2) Have them practice keeping their pelvis still (place hands on sides of pelvis) while anteriorly and posteriorly displacing their ribcage. It will look like an african dance move.
I always demo it both of the above scenarios first so they have a visual.
You can also have them try this in supine and in 4 point kneeling.
I hope this helps!
Thank you Trina for that awesome description of the wave !! How do you explain to students the difference of moving the pelvis and spine? I understand how the wave shows students the blind spots but how do you like to verbally explain this difference – do you find it helps,to explain this or is it difficult for students to grasp?
Yes thank you for the Utube visual! I am pretty skilled at doing spinal articulation but talking it out is another thing! Thanks for the break down in written form as well
What a fun idea to use the balls to teach how to undulate the spine! I like the reverse variation—will be trying that soon. Segmental movement is so important for spinal health and can be very difficult to teach as well as find in the body.
Thank You Trina! Wonderful read and I loved how through you were in your explanation in how to correctly perform the WAVE. Now time to work on my articulation.
Great blog Trina. I am more of a visual or kinesethic learner, but you painted a wonderful picture in your written description, in fact I was able to do it before watching the video. I love this “flashlight” technique that shines light on all of those blind spots that can be associated with global back pain.
Great method for locating blind spots. We can’t fix what we can’t measure. And we can’t measure what we can’t locate! Awesome way to notice what parts of the spine move and what parts don’t move so well. Thanks, Trina!
Trina! You have a gift – I totally appreciate your breaking down “The Wave” like this. Bite size pieces are so much easier to (arc)ticulate! It has made a huge difference in my ability to keep track of my spine and explore my blind spots and has really helped me establish new neuromuscular connections. Years of tucking my tailbone in my yoga practice have left me with lots of blind spots above and below. This pose is so helpful not only for myself but for my students as well. I love teaching them “The Wave” !
I have just now realized that much of my bridging has been done by checking out. I am largely blind to my spine (no wonder, good ol’ scoliotic curve back there). I look forward to practicing this! And thank you for the video, because I did get a little lost.
LOVE the Wave!!! Especially after sitting in Level 1 for two days now I needed the wave. Great way for clients to be aware of flexion and extension of the spine and articulation in both directions. Can’t wait to try it out this week. And as a plus it feels great. Coming down with the extended spine was more difficult for me. Thanks!
Great blog! There is definitely a fascial connection from pelvis to occiput. I love the WAVE idea. When I teach spinal undulation, I use this analogy also. The balls help to hydrate the tissue and awaken the mechanoreceptors (i.e., proprioception). The WAVE can help individuals see where they are lacking movement fluidity and building a myofascial dam. I know Swimmers I have worked with like the analogy for the WAVE. I look forward to reading your other blogs.
We are such complicated beings and I think when we think of our spine and not just our “back” we start to better understand the function of our bodies. This was an interesting way to do so. Thank you.
I always articulate through the spine from the top down, Thoracic through Lumbar. Never thought to go the opposite way, I’m looking forward to trying this and seeing what else I can find. Thank you.
Oh the blind spots! The wave is easier said than done for me. I appreciate the written cues as well as the video. Thanks.
I have come to realize that articulating my lumbar spine is a real blind spot for me and I totally need to break out of the pattern of doing only the movements that are easy for me. Well, Level 1 training is doing a good job of breaking that pattern for me. Once again, you’ve explained this in detailed yet understandable language. I’ll be doing the wave.
Love both articles here Trina! One thing that really resonated with me in the Level 1 course is that we tend to only do movements that we’re good at, and we don’t get anywhere! I’m definitely a “Beyonce,” and even though I teach and practice a great deal of Pilates, I always struggle with lumbar spinal articulation. It’s like I miss a big chunk! I’m excited to see how the Wave can help.
Oh, Trina, I’m so happy that you included the video with the step by step instructions of the WAVE because I do better learning a new concept when I approach it from various angles. I like your suggestion of using the warm bean bags for more proprioceptive feedback – something I think that would be helpful for me. I can’t wait to try this especially since I’ve noticed a big connection between my pelvis and my rib cage. If I anteriorly tilt, my ribs want to thrust. If I posteriorly tilt, my spine wants to flex. Sounds like practicing the WAVE will help me deconstruct that connection while allowing more spinal articulation. Thanks for sharing!
Thank you for both articles! I am more of a visual learner, but with THE WAVE I found it helpful to have the step by step instructions as well. I find this kind of careful spinal articulation work fascinating! Can’t wait to explore my body’s blind spots!