Recently, I extracted this message from a fortune cookie, “Change is happening in your life, so go with the flow!” And that is exactly how I teach a Yoga Tune Up® flow class: with an eye toward change and discovery. My previous blogs stated that the essence of a flow class is breath linked to movement, along with a loose structure for such a class.
As we continue our exploration into YTU flow-style classes, consider constructing your class around direction of movement (DOM) at a joint.
Set up a DOM grid as a helpful tool. Across the top itemize joint actions such as:
- Internal and external rotation
- Abduction and adduction
- Flexion and extension
- Circumduction
- Elevation and depression
- Protraction and retraction
Below each action on your grid, insert poses and mini-vinis (mini vinyasas) that articulate these actions. You might find certain YTU exercises hitting on multiple DOMs [ah ha!]. You will certainly find yoga poses that show up in more than one column. Visual learners may find this map is useful in helping present a well-balanced class and learning how to teach yoga flow.
Now that you have categorized your movements by joint action, create a flow class. Decide which joint[s] you want to emphasize; shoulders, hips, spine. Select your poses and weave them together. One key to flow is aligning similar movements. Try it out on yourself. Does it flow? Are your transitions natural? Can you connect your breath to your movement? Don’t forget to insert your check-in pose anywhere and everywhere.
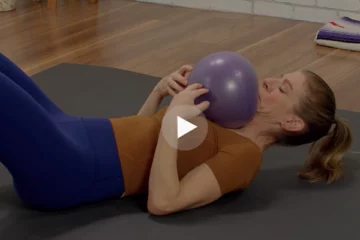
A hips class might have child’s pose as a check-in. Begin with a breath assessment in child’s pose, evolve into a mini-vini and your own flowing vinyasa using YTU inspiration such as walk the plank. Standing sequences can transition through warrior I, warrior III, moon rises (seen below), revolved half moon. Or prassarita variations with prassarita lunges. Back bends might flow from warrior III, to half camel and full camel. Hip roll out might include pin and stretch on the quadratus lumborum [QL] with the alpha ball. Wind down with a half happy baby mini-vini, apanasana variations and twists.
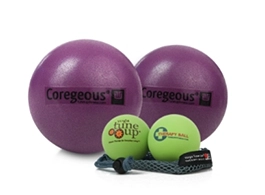
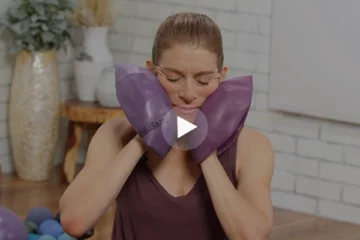
A shoulders class might have a simple arm flexion as a check-in. Roll on Therapy Balls at the beginning and progress into your vinyasa. Or, begin with your breath and check-in in pose, then move into DJ arms (seen below), or shoulder flossing before you flow. Standing sequences could have epaulette arm circles while in a warrior 1 or crescent lunge. (http://www.tntechoracle.com/) Strength and stability poses such as dolphin supinate or mega-plank create a natural segue into your wind down. Perhaps your backbends are bridge and bridge lifts. If practicing locust, try adding open sesame. The choices are endless.
Structuring your YTU flow around DOMs is an easy way to educate your students without a lecture. They will simultaneously learn through proprioception and intelligence. Your movement vocabulary along with your language create self-awareness and embodiment for your students. Be creative and they will love you!
Remember, there is no strict formula. Your yoga flow classes will evolve and become as individual as you are. Your special sauce will be informed by the dynamics between you and your students. So go into the movement lab, be open to discovery and have fun!





Using the direction of movement (DOM) grid to structure Yoga Tune Up flows is such a smart approach! Focusing on joint actions like flexion or rotation brings more intention to each movement and helps deepen understanding of body mechanics for the students.
These are some really great examples of knitting YTU poses into a flow style practice! I love the idea of revisiting a check-in pose throughout the sequence. This is totally getting my creative juices flowing for the classes I’m teaching this week. 😀
These are some great ideas and pointers for putting together a Yoga Tune Up class that flows from one pose to another and connects breath to movement. I look forward to planning a class that uses some of these techniques.
Wow, thank you for all these examples. I really like the Dj arms and the mini-vini in the half moon pose. I will definitely include these variations in my classes.
This is great way to help students learn!
I need to revisit this post and take notes! I love the idea of creating lists of poses for DOM’s. It will help my learning and effectiveness as an instructor. I am also going to add the DJ Arms to my list, because arm balances make my forearms SUPER tight!!
Wow! This is exactly what I needed to read. I am a Forrest Yoga teacher in the midst of a YTU training. I am loving this system and fully believe in it’s ability to heal and keep people pain-free. This article gives me some accessible and creative ways to incorporate YTU into my sequences. I love the segway of warrior 3 into moon rises.
Awesome blog. Very pertinent to what I am doing . Loved the. Idea of
DOM chart. Can’t wait to create my Chart and begging creating flow sequences using this method.
I really like the idea of using the DOM grid to help create Vinyasa flow style classes. This will help me share the Vinyasa style yoga with Yogis as well as teach them ways to work through these same areas on their bodies as well as teach them about DOM. GREAT IDEA!!!
Very complet and Creative class… thanks
Good ideas to be more creative thanks
This is such an interesting way to create a class! When I think about how I might begin to incorporate YTU concepts, this provides a clear grid from which to proceed.
Thank you for sharing your insights!
I love the idea of using DOM grids to help build YTU flow sequences. You will be sure to find links between poses you never thought had similar attributes and benefits, and be able to involve a lot more diversity in your flow classes! Thank you for this, it is a great practice to involved in planning of classes.
Thank you so much! This is such a clear formula for building a YTU flow class.
This is super helpful for thinking about how to structure a class that has a clear beginning, middle, and end. The grid will be great for both focusing on one or two DOMs and building to a peak pose, but also covering all the others.
I really appreciate the “check in” concept. It helps students become more aware of their own unique structures, their individual range of motion – and to immediately feel the effects of the practice. Simple, positive reinforcement.
great article Nancy. Such an awesome guide to incorporating YTU principles into sequencing. I absolutely agree with the idea of having a loose plan but going with the flow. thankyou
This is a tremendous resource for people like my self who are either taking or have taken the YTUTT. I had been feeling a little overwhelmed with the massive amounts of information I’ve recieved and was not sure how to incorporate it all. Nancy lays out a simple yet effective framework from which you can develop a class and grow confidently as a teacher
Thank you!
It’s good to remember there is no strict formula , change things up and think outside of the box.
My top two takeaways from the blog are the top itemized joint actions that will help me to decide a series of sequences for a well balanced exercise program. Second take away is to insert check-in poses into the sequence. It always good to establish a baseline and assess the improvement afterward.
I love designing classes using DOMs – it’s like tearing apart a Lego house and rebuilding it into a castle. It’s especially fun finding ways to incorporate muscle strengthening movements into classic yoga poses, or even between them, and seeing the reactions on your students’ faces when they notice a difference the next time they come back to a pose that we visited earlier in the class.
Thank you for your post, “Your yoga flow classes will evolve and become as individual as you are” is very encouraging.
Thank you! I am an RMT taking yoga tune up level 1 and feel a little like a deer a in the head lights about teaching yoga to a class of yogis. This logic is definitely going to serve me beautifully in my final test!
I have never thought of teaching a class based around a DOM, so this concept is all new to me and really inspiring. So true how you mention that this is a way to teach your students anatomy without going into a ‘lecture ‘ about it. A post packed with useful information – thank you!
Wow! Thanks for sharing this easy to use tool for integrating the wonders of yoga tune up. What a great way to break it all down to be able to apply this awesome work.
As a recent attendee of the YTU Level 1 Training I’ve been thinking more and more about how to sequence my classes. The DOM grid is very helpful.
Thank you!
I love the idea of a class based on certain DOMs as a way to “educate your students without a lecture” and let them learn by experiencing. Thanks!
great tips – need to check out your classes
I love the DOM grid as an approach to planning and teaching a class, especially linking the DOM while doing the pose or vinyasa to increase proprioception and kinesthetic sense, rather than lecturing. I can see how that would be a much more effective way to teach & as a student to make the body/brain connection.
Thank you for this very informative article about sequencing. I appreciated your sequences and very specific and thorough examples for hips and shoulders.
I’m getting very inspired by your post, using DOMS I find it fascinating how easy and simple is understanding a pose or movement having the focus on the direction of movement. If I am clear about what is happening on hips, shoulders, etc, the class makes sense and also it gets very easy to link one pose/movement with another one. I wish all yoga trainings had this emphasis, because it is extremely valuable and relevant.
Sequencing a yoga tune up class is not easy for a newbie. The DOM approach is a great methodology. Use one breath one movement make a vinyasa class and DOM approach let you force on what you are going to do during the class. Train the proprioceptor within the joint and corrected the overuse or underuse muscles or joints. Find the both extremes and get back to neutral. Recheck your body and compare help to train your awareness.
Thanks for the helpful tips, Nancy! Using the DOMs to help sequence is one of the things that I am most looking forward to incorporating into my teaching once I complete my level 1 certification.
Great ideas on creating a flow class based on DOMs. This makes it so innovative and unique.
So many great ideas here, thanks for sharing! The DOM grid will be super useful as are the hip and shoulder examples you have given. I love the idea of ‘educating without a lecture’ – thank you for the very helpful posts.
Thanks Nancy for these awesome tips. I think the grid of DOM and noticing how many poses come up in columns will be very helpful when creating a sequence. Another great way to create a fluid YTU flow seq. Not just fluid, but also intelligently sequence and educative to the students and an exercise for me s a teacher. I can always refer back to this one . Many thanks. x
Before I read this post, I made the flow too complicated even myself can’t handle it without script. With your ideas here, I can have a better direction of constructing my flow. Definitely gonna educate them the DOMs gradually in my classes so that we can all share the same language which is easier for them to identify their difficulties too.
I’m new to the YTU model, so this is a helpful suggestion to start weaving it in with my regular Yoga teachings. Thank you!
I’m learning so many new tools! The DOM grid is going to be a great platform for me to start practicing my creativity covering all the bases! Thanks!
During my YTU training this has been on my mind – how am I going to incorporate some of this into my style when I teach? And this is exactly what we covered in class today. I’m excited to “create my own language” around DOM cues. I think using a lot of the YTU poses and ball rolling techniques are great prep-ers for flow. Once we have an idea of our class structure, we can stick to a theme or similar movements to really explore the depths of our movement.
Thank you so much for this post! As a current YTU student, I feel confident guiding students through the templates learned in class, but feel overwhelmed by the idea of creating my own classes and sequences. Thank you for breaking down a formula that I can use to design classes and for providing some general examples – this will be an incredible tool to have handy when I start teaching YTU!
Thank you for sharing this, Nancy! Just like you, I’m also a visual learner, so I’m going to incorporate the DOM grid while constructing my class. Thank you for the helpful tips.
Lovely article, Nancy.
What do you mean from W3 to half camel?
A nice exercise in organizing thoughts around a sequence for class. Thanks.
A new perspective for this old dog.
Thanks for your insights
As a new instructor to the Yoga Tune Up world thank you from the bottom of my heart for this advice !
Creating a class plan around DOM”s of a joint or joints is a great idea! It facilitates the instructor’s thinking about how poses are related and complementary. As a student, I always feel willing to work a little harder when there seems to be a purpose and a plan behind the sequencing in the class. I bet your students do too.
I love the idea of a DOM grid! Smart, thank you!!!
Great advice! I used to lead my class to a peak pose but focusing on one DOM throughout the class really drives home the focus and my students are left with something. Thanks for the post
Love this article. Thank you for the tips!
Thank you for the fantastic article. So many helpful tips for building a class.
I just completed my level 1 YTU and it has really inspired and refreshed my classes and my own practice. Thanks for suggesting the DOM grid as a way of integrating the movements into a fun flow and sharing your sample classes. I will definitely try this out! I’m not familiar with the “open sesame” variation of locust, can anyone describe this?